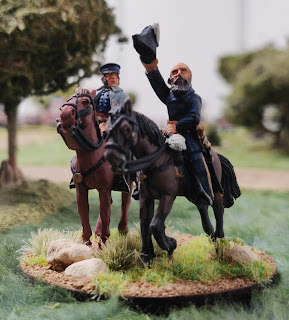
This week's game here in GHQ featured another outing for my growing Crimean War collection, in the form of the fictional 'Battle of Arzov'. Grand Duke Robinski commanded the Roosians forces and that scion of an unbroken line of military incompetents, General E.Useless, once more took command of the British forces. To say his orders were awaited with trepidation would probably be putting it mildly. On to the battle then without more ado ~
The forces gather on the battlefield ready to aquit themselves honourably...or not.St Olav's church sited on a low hill on the outskirts of the village of Arzov. On now with the usual annotated photomontage hopefully carrying you my loyal reader into the heart of the action ~The First Division comprising the Guards and the Second Brigade, screened by elements of the Rifles advance on the left of Useless' line.
While in the centre the Highland Brigade are similarly screened by elements of the Rifles, and supported by the Light Cavalry Brigade and the RHA, while advancing in column.
The four battalions of the first Russian infantry regiment make a string sight as they advance screened by a Rifle battalion.
On a low rise Robinski has deployed two heavy batteries hoping their fire will deplete the morale of the advancing British. They are supported by a Grenadier battalion and a small unit of Uhlans.
The Four battalions of the Roosian Jaeger regiment advance in massed columns, screened by elements of a Rifle battalion.
Gen.E.Useless has obviously learned some lessons from his earlier heavy defeat as the lead battalions of the First Division deploy into firing line while the massed Roosians are still a ways off.
The RHA battery is pushed well out Infront of the developing British line ready to lay down fire on the massed enemy columns.
On the British right the Light Division's First Brigade is delayed by difficult wooded terrain and this gives the infantry regiment of four Roosian battalions the opportunity to make a rapid forward movement.
Luckily the elements of the Rifles attached to the Highland Brigade come to their aid and form an effective skirmish screen protecting the Light Division's First Brigade as it struggles through the woodland.
The 93rd deploys into firing line, supported by the battery of the RHA, as the 23rd emerge from the woodland just in time.
Massed Roosian columns are menacing the British centre supported by a Grand Battery on the low rise in the distance. The Roosian bear is growling it seems!
The Grand Battery has the support of two units of Cossacks who in turn have a light horse gun. A Rifle Battalion in in the rear of the battery ready to offer support if it comes under infantry attack.
The Duke of Cambridge encourages the troops of his Division to stand fast as the Roosian hordes approach!
The Rifles advance briskly onto the hill hoping to drive off the Cossack horse gun. They find the going tough and fail to reach their objective (🎲🎲🎲).
The Roosian attack is developing strongly on Useless' right with the 79th caught in column by the leading enemy battalion. To relieve pressure the 17th Lancers charge the threatening Uhlans.
The two lancer armed cavalry units crash into one another in a swirling melee...
The Uhlans triumph, breaking the 17th who flee to the rear in rout!
A 'Thin Red Line's moment as the victorious Uhlans make a sweeping advance into the 93rd! The 93rd are supported by the first battalion of the Royal Scots.
Although at a disadvantage being caught in column, the 79th defeat the attacking Roosians who retire in Disorder. The chaos on Useless' right is slowly stabilizing.
Masses of Roosians close ominously on the Guards who have the close support of a battery of the Royal Artillery. Both sides are crashing out volleys on one another and losses are mounting.
Useless takes post in the centre of his line where he expects the crisis to soon unfold!
The Highland Brigade is holding its own against the Roosian hordes as the RHA battery to its left is caught by a surprise Roosian assault!
On his far right the Light Division's First Brigade has halted and then pushed back the massed Roosian columns with effective volleys of fire
Cheers ring out along the line as the gunners of the RHA battery remarkably drive off their attackers in Disorder!
The Duke of Wellington's regiment are assaulted by a Roosian column as they come to the aid of the 79th.
"The Guards will advance!" Well, perhaps not yet, but they are at least now formed up ready the pour volley after volley into the Roosian ranks.
The long drawn out melee between the 79th and their Roosian opponents comes to a sudden end when the morale of both sides breaks and they flee away to the rear!
The 33rd are also Broken but pressure is relieved at the vital moment when the morale of the Roosian regiment falters and they retire Shaken. On his Right flank Useless' position is strong and the Roosian centre finds itself threatened unexpectedly.
The gunners of the Royal Artillery cannot match the exploits of their comrades in the RHA and are overwhelmed by the attacking columns of Roosian infantry!
The Coldstream Guards are also Broken as a result and it seems for a moment that the British centre may buckle and break even.
Volleys crash out on the right as the Light Division's First Brigade drives off Roosian cavalry in rout! The Roosian centre finds itself suddenly threatened from its flank even in its moment of triumph!
The Guards are holding firm in the centre left and the Light Division is advancing rapidly on the Roosians who find their attack faltering.
The Guards have taken a battering but have not broken unlike their Roosian opponents who are streaming to the rear as Robinski conceded the field to the British! Hurrah!


