David Bickley's Wargames Blog

The occasional ramblings of an average gamer, journeyman painter, indifferent modeller, games designer, sometime writer for Wargames Illustrated and host of games in GHQ.


Monday 22 April 2024

A Fourth Jaeger Battalion

And so they were done! At last! And not before time! Thank God for that! And so on... Yes, you guessed correctly, I'm more than a little chuffed to have finished the fourth battalion of my Jaeger Regiment and with them the Roosian infantry component of the Crimean War project!!!!! 

The figures of course are from Great War Miniatures, flags from GMB Designs and bases from Warbases as ever. The figures come from the two Firing Line packs, respectively in helmets and caps, with others from the Command pack in caps. You would just know it, but only on the last four figures did I finally figure out an easier way to hold the figures while painting the cap bands! Much easier, so I wished I'd thought to hold them upside down about eleven months or so ago! DOH! Here they are anyway ~

Of the original figures for the project I only have six Roosian Dragoons, a part of Colin's generous gift, so I must get them painted soon. Next though are a regiment of British infantry mostly in greatcoats to represent the 7th, the Royal Fusiliers. Beyond them lie two more British infantry regiments, the Earl of Ulster's and the Perthshire Volunteers. Both the latter need flags ordering along with one pack of Light Infantry command figures. 

The French infantry I've been accumulating together with a Cossack regiment and cart will wait a while once those are completed, I feel I need a change of theatre and period!

Saturday 20 April 2024

The Crimean War Project Progress Report 1

With the mustering in of the Cameron Highlanders I thought I'd take the opportunity to review the figures I have painted for the project in the current cycle, starting of course with the British army. So, to recap; the figures from the Prodigal Foundry Collection are not included in this review, just those I have painted from the offset in late June last year. The figures are from the Great War Miniatures range, the flags are from North Star and the bases from Warbases, just in case anyone has missed that! I organised the figure painting around the flag sheets, starting with the three Guards battalions of the First Brigade, the First Division, and then moving on to the Second Brigade of the Division. Not forgetting the Rifles either!


The second Division I'd decided to work on was the Highland Division. Painting kilts is a mix of masochism and ecstacy, a test not only of your skill but your resolve too. So far the Division comprises two kilted Highland regiments, the 79th Cameron Highlanders and 93rd Sutherland Highlanders, together with the First and Second battalions of the 1st, the Royal Scots. I have one unit in the old Lead Pimple still for this formation in the shape of the 90th, the Perthshire Volunteers but still have to purchase their flag!


In all that's eleven battalions of infantry painted so far! In addition of course there is a battery of the Royal Artillery alongside various Command stands and extras, even a fripary! 


This pretty much makes up my intended collection, to fight the new collection of Roosians which will feature in Part 2. I may even achieve my stated ambition of adapting Soldiers of Napoleon despite having jumped in to Black Powder for the early games. 

For those who like to know these things there are two other British infantry regiments still in the Lead Pimple besides the 90th. There are the 7th, the Royal Fusiliers and the Earl of Ulster's regiment, the latter also needing a flag sheet to be purchased. Thankfully though there are no more Roosian infantry!


Tuesday 16 April 2024

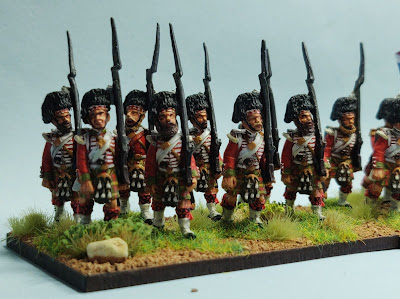
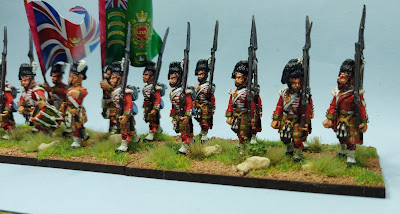
The Cameron Highlanders

After many lengthy sessions, by my standards, at the painting desk over what seemed like eons at the time, the Cameron Highlanders have mustered into GHQ ready to join their fellow regiments in the Highland Brigade for my Crimean War project. When I appealed for information on the issue of hose, sporans and plumes I got two really good replies from Stephen first, then from Aly Morrison. The image below is from Aly's Almark on Scottish regiments and confirms my choices and Stephen's information are mostly correct, though perhaps the red on the kilts might have been broader!

It is strange, but I thought these 24 figures would take me the best part of a month but they are done in about 12 days. The figures are from Great War Miniatures , the flags from North Star and the bases from Warbases of course. Here they are anyway without any more waffling on ~

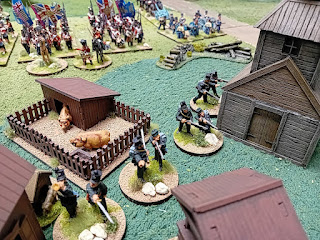
As a bonus here is a period photograph of my Highland Brigade in action at the recent Battle of Bugerov ~

For now though it's back to painting Roosians in the form of the fourth Jaeger battalion to complete the regiment! Their first base of figures is completed already and just needs texture and vegetation while the second base's figures are all ready to face the brush!


Saturday 13 April 2024

The Battle of Bugerov 1854

'History' tells us little of this long forgotten encounter; few eyewitness accounts have come down to us, perhaps suppressed by Horse Guards wary of unwelcome news? It is however rightly remembered as a 'Bloody Affair'! Now, Dear Reader we may finally discover why in the following annotated photomontage assembled from the lost papers of the late General Flashman, a survivor of the battle it transpires ~

No doubt the blaggard survived by taking timely refuge in St Olaf's church, perhaps even helping himself to the silver along the way?


Meticulous research in the recently rediscovered tranche of Flashman's papers seems to suggest that the battle was not planned or even really desired by either side, simply occuring when two arms of the respective armies were surprised to encounter one another in the vicinity of the small village of Bugerov where pigs and chickens seemed to outnumber villagers ~

Despite the unwelcome encounter both commanders hurried to issue orders to their Division and Brigade Commanders. For the Roosians Grand Duke Gornellevic was not prepared to see the invader despoil even this collection of hovels ~

While in the British ranks the orders of General E Useless were awaited with equal parts of anticipation and trepidation ~

Enough of this waffling on, let's cut to the chase and get the AAR on the road! The Battle of Bugerov awaits!


Elements of the Rifle Brigade skirmish on the outskirts of Bugerov awaiting the arrival of supports from the Highland Brigade.
Roosian infantry from the Rifle Battalion exchange fire with the Rifle Brigade in the village while ominously large numbers of Roosian infantry advance slowly in their support.
The Ligh Division fields three battalions on the British right, supported by the small Light Brigade of cavalry. Useless hopes to use the Light Division to pin the Roosian left flank while the Light Brigade moves around and in their rear.
Elements of the Rifle Brigade have worked their way into Bugerov as the Highland Brigade and supporting foot artillery reach the outskirts.
Fighting for the village intensifies as Rifle Brigade and Battalion exchange fire at close quarters and massed columns of Roosian infantry reach the village's outskirts.
On Useless' right the Light Brigade of cavalry with it's supporting battery of the Royal Horse Artillery, advance in support of the Light Division.
Away on Useless' left flank parts of the First Division find themselves at a disadvantage as massed Roosian infantry close with them.
The 23rd find themselves assaulted by massed Roosian columns which their close range fire failed to mark at all! {At this point we made a fundamental mistake with the rules which with hindsight altered the game's development.}
Back on Useless' left the regiments of the First Division have formed line and delivered devastating close range volleys which Disorder the Roosian columns! Hurrah!
But on Useless' right the 23rd are Broken and flee! Oh the shame!
All along the front now the action is intensifying. While the columns of Roosian infantry faltered the Cossacks and Hussars sweep forward. The 13th are caught in line and put to the sword. Their morale crumbles and they flee Broken to the rear.
The Grenadier Guards though stand firm against the Hussars who are Disordered by a Close range volley! Their charge fails to break the British line here, but the Cossacks' victory sees the 13th's supports also broken!🎲🎲
In the centre the close quarter fighting for control of Bugerov swings first one way, then the other. Sadly though on the right the 33rd follow the 23rd in rout, having Broken as their supports. Their loss breaks the Light Division and leaves the Light Brigade unsupported.
Bugerov remains contested in the centre, but Useless' left is beginning to crumble as weight of Roosian numbers begins to tell while British firepower proves uncharacteristically ineffective. The Quartermaster General may have questions to answer it seems!

With his right and left flanks defeated General E Useless' finds his army is Broken and despite success in holding off the Roosian attacks on Bugerov he is forced to concede the field to Gornellevic. The fundamental rules error we made probably hastened this defeat we agreed the next day, when chatting over the game by text, but the failure of Useless' left to deploy and move decisively really handed the advantage to the Roosians by limiting their time advancing under fire. Nevertheless we now have several good ideas for rule adaptations in the next game to hone the feel of a Crimean battle, so keep an eye out in a fortnight's time for the next run out.